RG59 Siamese Cable: What You Need To Know

RG59 Siamese Cable

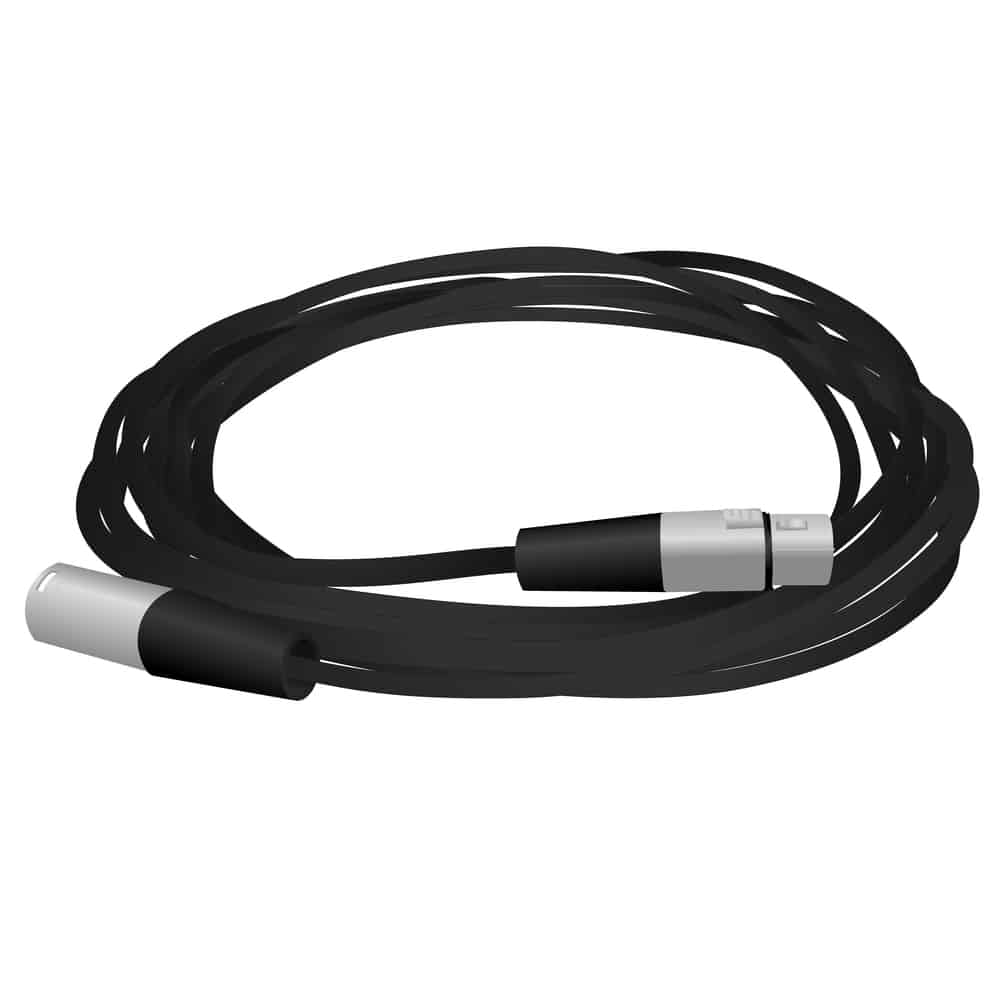
Do you need a cable that can be used to power your newly acquired CCTV camera system? Would you like to install power and video runs using only one of your security cameras? The Rg59 Siamese Cable is the most popular cable for the job. Its application for power and video transmission are some of its advantages. It is also heavily secured from EMI (Electromagnetic Interference) and is mostly durable to take on long-term installation on long-distance runs. Look no further than in this guide; we will cover a cable meant for that and the best you can get for its value.

Custom rg59 cable

Chapter 1: Types of Cables for CCTV Cameras

Numerous components decide whether somebody will buy an IP camera framework or an HD DVR camera framework. However, the primary factor would be whether there is any current cabling setup that can be reused to keep away from the expense of running a new cable.

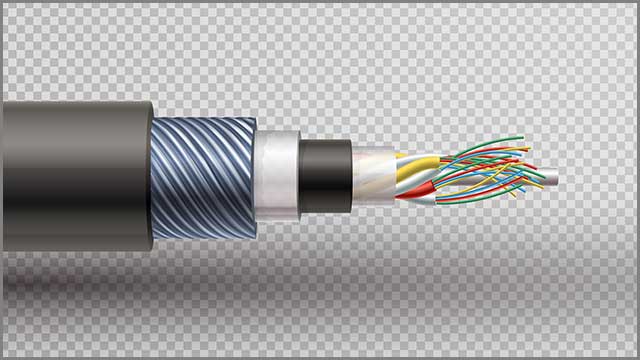
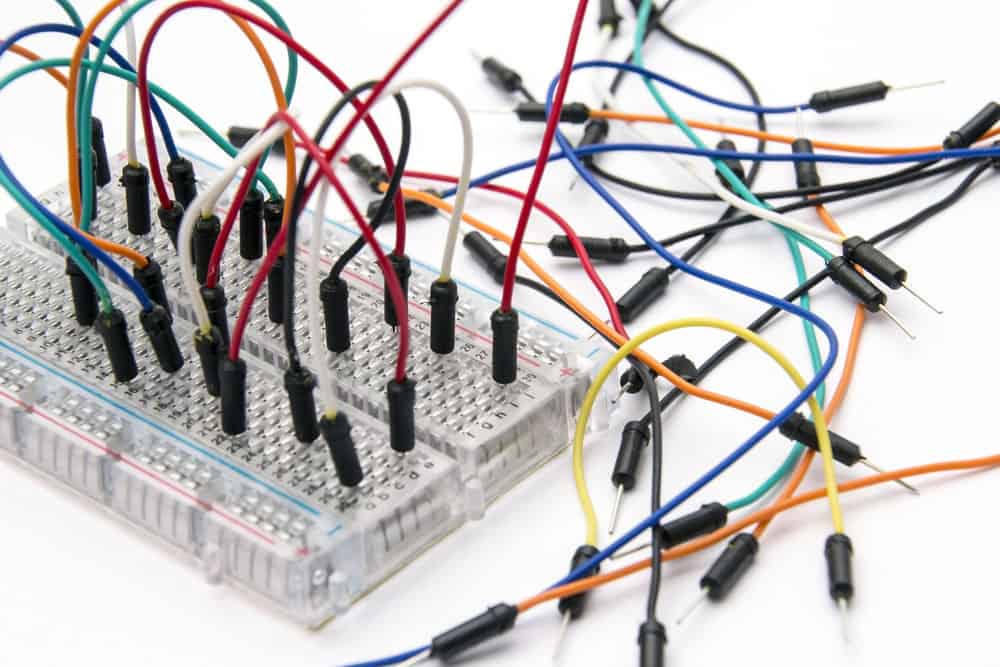
Siamese links are coaxial links onto which many intensity wires join. These power wires might be divided from the coaxial cable if the power source is distant from the account gadget.
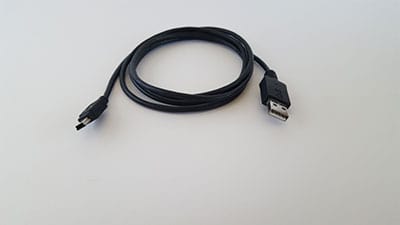
Siamese Coax Cable

This is a “two-wire” solution coupled in one cable that permits pure power and video transmission for BNC cameras. It comprises two distinct cables connected in one cable coat. Attached is a video conductor that sends the video signal from the camera’s BNC connector. Moreover, a power wire transmits power to the camera from a closed power supply to the DVR recorder.

There are a few distinct grades of siamese cabling accessible for various video signals. These are of two main types:

  • Pre-made siamese cable: This comes pre-assembled with differing lengths and end connectors. Pre-made CCTV cables accompany every one of the connectors pre-ended on the wires, so the installer needs to plug them in and turn on the cameras. They usually are offered in numerous lengths to help different lengths necessities. So it is imperative to gauge the distance from the surveillance cameras to the DVR (Digital Video Recorder), so you can pick the privileged premade links for your needs. These cables have developed in prominence and are perfect for do-it-yourself entrepreneurs looking for a quick and straightforward surveillance camera installation.
  • Siamese Coax Cable: This comes from a spool or roll of higher quality. It has no pre-connected connectors, and the user needs to place the ends on them and cut them to any length.

Chapter 2: What is RG59 Siamese Cable?

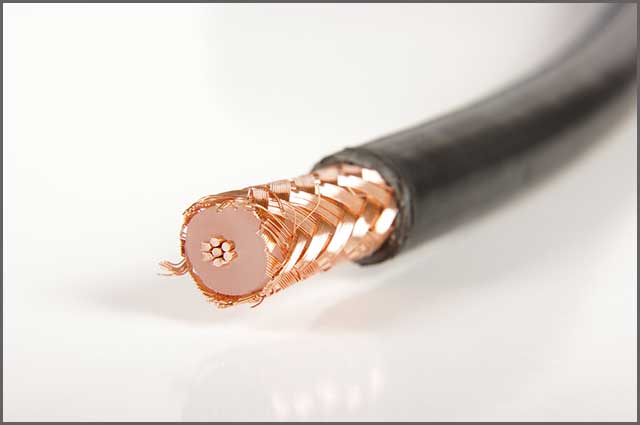
The RG59 Siamese Cable is a cable that allows installers to use a single cable to run both power and video to security cameras. It is heavily shielded; contains an RG59 COAX cable meant for video and 18 gauge power cable paired in one jacket.

The RG59 has an active copper center, 95% copper twisted protecting, and 75-ohm impedance. It is the best COAX cable to use when installing HD CCTV and CCTV. The18-measuree pair is used to runyour cameras’e AC or DC capacits.

RG59 Siamese Cable Pros:

Adaptability: These can be utilized to transmit both power and video simultaneously. In this way, they return exceptionally high an incentive for cash and are consequently extremely excellent buys.

Information Integrity: The functions of these cables permit the transmission of intensity with no undue obstruction with the transfer of video. This enormously improves the unwavering quality of information.

Rearranged Operations: The move toward setting up a video reconnaissance framework is significantly improved because both power and information are transmitted in a similar cable.

Versatility: The cables might be utilized nearby a few different hardware gadgets and cables, for example, shut circuit TV (CCTV), reconnaissance cameras, wired security framework, and RG59 coaxial cable.

RG59 Siamese Cable Cons

Mind-boggling: They are progressively convoluted to deal with, introduce, and work when contrasted with other video security links.

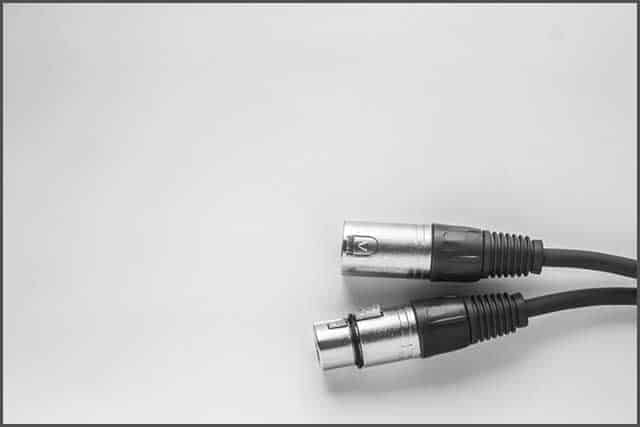
Chapter 3: RG59 Siamese Cable Connectors

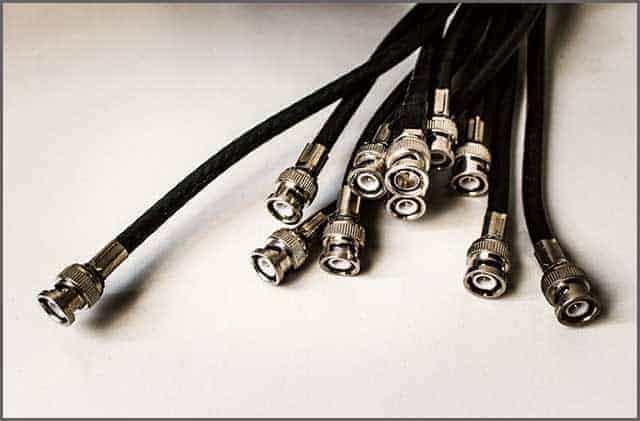
Premade cables are cut to exact lengths, such as 50 feet or 100 feet, and connectors already exist. You just run the wire and attach it to the wall. However, you will buy two power pigtails and BNC connectors for every camera you tip and associate with your camera’s power and video connector. The following are the types of connectors for CCTV cables

1. Compression Style CCTV Connectors

Pressure style CCTV connectors are the exceptional connector of decision. These function well when you need a weatherproof seal. These connectors give an end and give long periods of issue-free administration. Since CCTV connectors cause the fundamental issues with lessening CCTV, it is best to ensure the first run-through is accurate. After that, check each run a connector has been introduced to ensure you are getting a great signal.

2 Plain Style CCTV Connectors

The use of connectors while installing untested cables can cause problems. These are exceptionally normal when introduced accurately, give long stretches of administration. The best problem with these connectors is that the installer gets some protective lines that come into contact with the inside stick, which causes the image to bend. This is because it is continuously harder to investigate a cable run after the installation as it causes considerably more work. Set aside the effort to add them effectively.

3. Other CCTV Connectors

These comprise elbows and twists, converters T’s, and connectors on CCTV connectors.

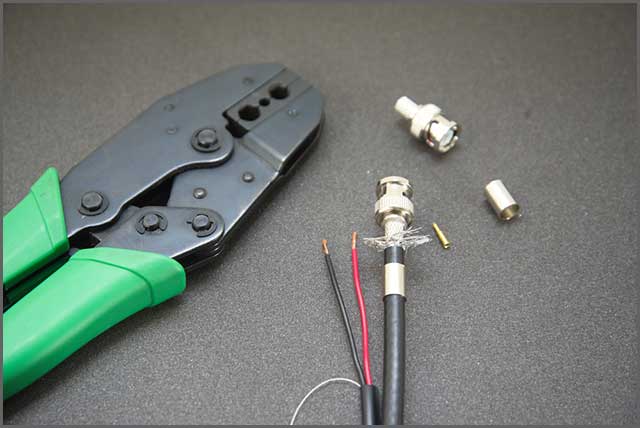
Chapter 4: How to attach these BNC Connectors

To do this, we would need the following:

  • Rg59 Siamese cable connector ( industry-standard link utilized in CCTV camera installments).
  • Compressor type F connector. This is an F to BNC male connector.
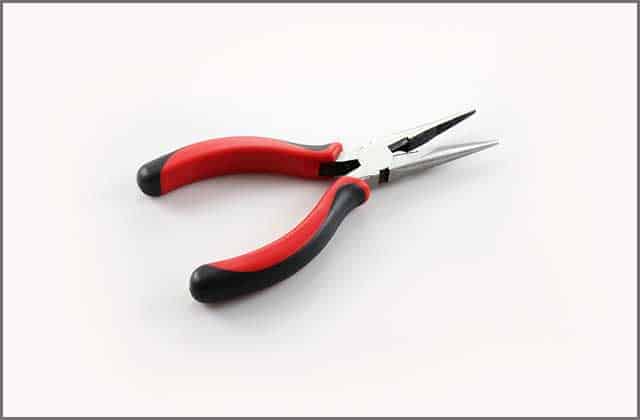
  • Tl33 urge pressure apparatus.
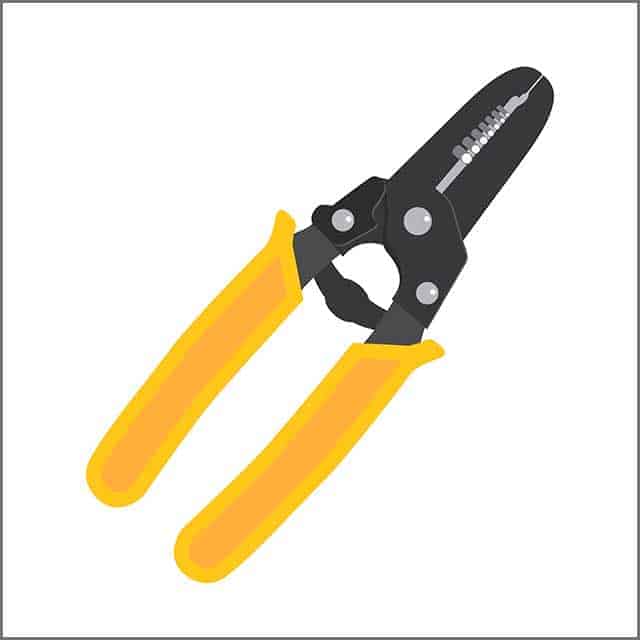
  • Tl22 cable stripper
  • A standard wire shaper.

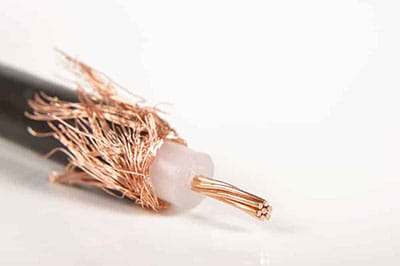
The initial step is to utilize our cable stripper to strip the persuade link appropriately. 

Spot the Rg59 in the Tl22 cable stripper making around an inch stand out way past the apparatus. After that, turn the cable stripper around the cable five to ten times until you never again hear the device cutting.

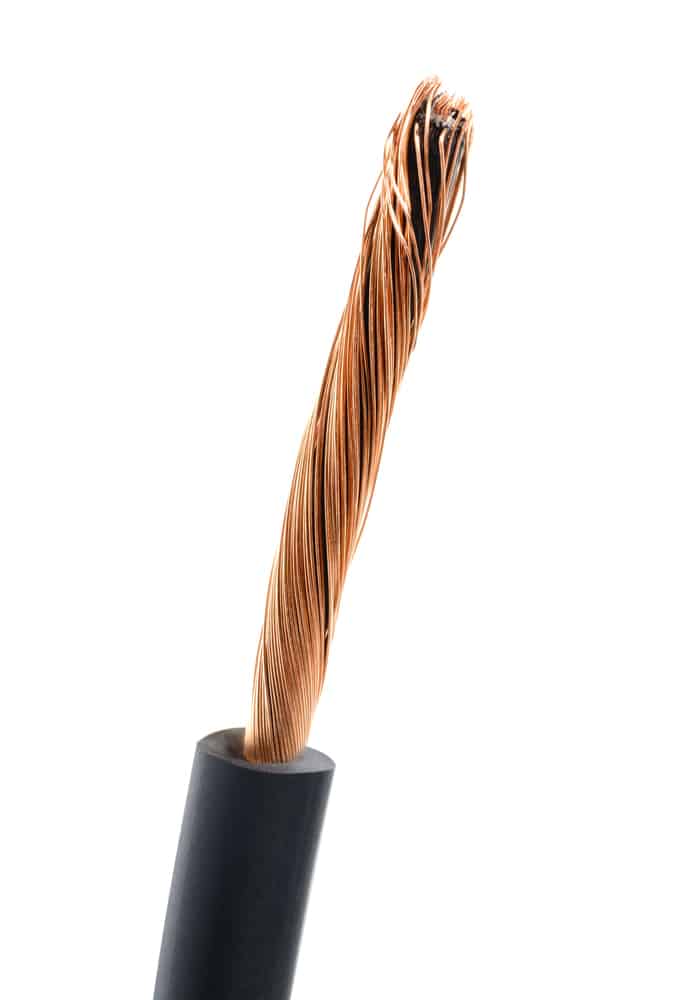
The Tl22 makes two unique cuts in the cable. The second cut evacuates the external layer of the plastic coat. A more deep cut is made to the cable to strip all layers to leave just the core.

You need to ensure the more profound sharp edge did not cut into the center, which will weaken it. You likewise need to ensure that no part of the copper meshed cable touches the core.

It would help if you made sure that most meshed copper is left set up and not cut. After the cable has been stripped appropriately, strip back the braided copper shield.

This is significant. Try not to cut or expel the copper meshing. It is essential to ground the cable adequately. Recheck to affirm no shielding cable touches the coax of the cord.

Next, put the compression F connector on the wire. You should make sure the connector is set right on the cable, making the white separator come marginally via an opening in the connector.

Once in a while, it takes a touch of contorting to ensure the connector is seeded right. Here, the insulator becomes visible.

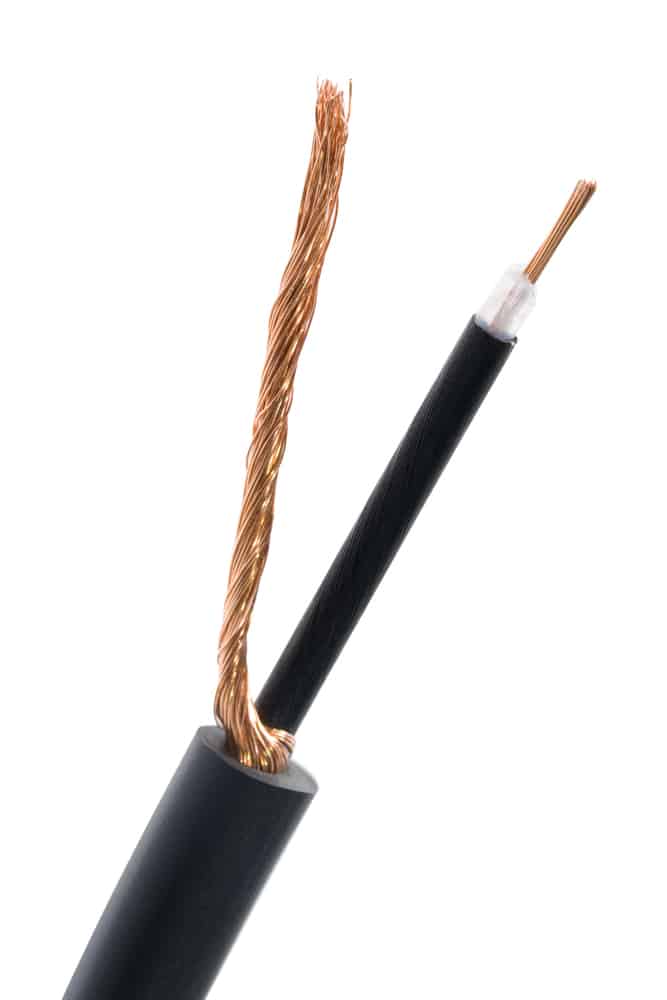
Trim the uncovered core to be equal to the end of the connector. After that, get the Tl33 compression device.

Place connector on it, ensuring cable core enters the gap on the compression instrument. After that, crush the tool. Then, the F connector becomes solidly joined to the Rg59 cable. Lastly, screw the BNC connector to the F connector.

This is an exceptionally safe approach for a BNC connector attached to an Rg59 coax cable and presumably the most loved strategy among most expert installers.

Chapter 5: RG59 Siamese Cable Length for Your Setup

How to manage wire lengths?

  • Utilize a stripping apparatus to take protection from the coax portion of the cable. You can arrange a decent quality stripping apparatus here. Altogether, for the connector to go on smoothly, you will need around 3/4″ of the inside channel appearing and about a similar measure of the copper wire mesh appearing.
  • Ensure that none of the strands of copper wire twist contacts the center conveyor wire when you wind on the BNC connector. On the off chance that they unintentionally touch, this won’t harm the camera yet can bring about a dark (shorted out) picture from the camera.
  • Bend on the BNC Connector onto the wire until it is cozy. You will rehash Steps 1 – 3 for the DVR part of the arrangement link just as the camera end.
  • Slice the wire on the camera power supply around 6 to 12 crawls from the camera connector. Strip back the wire (on the two sections) 1/2 inch or so to uncover the white (positive) and dark (ground) wires.
  • Utilizing wire nuts, associate the power supply’s white wire to the red wire of the RG59 2 channel and the dark (ground) wire of the power supply to the dark wire of the two conduits.
Rg59 Siamese cable

Chapter 6: Customized rg59 Siamese Cable Assemblies

Wiringo can create your customized RG59 Siamese cables for households and industries. You can get all of your special cable assembly requirements.

Why do you need a custom CCTV cable?

We use these CCTV cables in our homes, workplaces, and offices for several video and audio components. CCTV cables are limited to individual use, but commercial sectors like telecommunication and the internet industry also use these cables for different purposes.  If you have special needs and want a customized CCTV cable, we can engineer the perfect customized CCTV cable for your setup.

We provide customized cable connectors, connecting cores, harnesses, cable assemblies, and shielding for home and commercial use.   

Tips for choosing the perfect RG59 Siamese Cable

When choosing the kind of cable to use for your undertaking. You ought to utilize the most astounding quality cable accessible with the goal that it will be sufficiently able to keep going for quite a while. For example, whether the establishment is inside or outside, make sure the link you pick coordinates the earth. To withstand this development, the use of flexed continuous cables with an isolated wire core is paramount. Examples of this would be when the cable is used to interface scanners, tilt cameras, and pans.

Conclusion

From the knowledge in this guide, coupled with our expertise, contact us to get the best RG59 Siamese Cable for your specific needs.

Custom XLR Cable: What You Need To Know

Custom XLR cable are essential when it comes to industries. Many industries make use of this cable for various reasons. Since this is true, you must understand how to make it yourself to save cost.

If you have the skills required to connect the XLR cables, it’s straightforward to build your design to suit your needs.

Cloom Tech is an organization with a well-renowned international presence; You can also contact us to customize the XLR Cable.

This book contains the information you need to build your XLR cables. All you need to do is follow the instruction and enjoy the perfect XLR cable for your desires.

Custom XLR Cable 1

Chapter 1: XLR cable

XLR cables are balanced cables that possess three conductors as the negative, positive, and ground signal. In the three connectors, the first connector pin is known as the ground.

The second connector pin is positive, while the third connector pin is negative.

The way the connector pins work is such that the second and third connector pins, which happen to be the positive and negative signals, work in various capacities.

When both connector pins connect to the cable itself, they link to the first connector pin, also the ground signal.

Custom XLR Cable 2

Chapter 2: Building XLR Cable

It is quite a task to build XLR cables, especially for individuals who are new to them. It requires a whole lot of effort and good material to carry out the process.

When the person building the cable makes any mistake, it is expensive to replace the damaged material.

The trick to avoiding any unpleasant circumstance is to do what is right, follow instructions and use the correct type of material.

The best way to go about it is to use a soldering iron suitable for the job you want to carry out.

Tools needed for building XLR cables

There are quite a handful of tools required for building XLR cables. They include:

  • Lighter
  • Soldering iron
  • Cutters
  • Needle nose pliers
Custom XLR Cable 3
  • Hand tool
  • Knife
  • Wire stripper
Custom XLR Cable 4

 Materials needed for building XLR cable

  • Cable. Examples are Canare, Belden, Mogami
  • Heat shrink
  • Neutrik XLR connector
  • Solder

Chapter 3: Processes of building XLR Cable

The process of building an XLR cable is an enjoyable task. It is easy to construct using these simple-to-follow steps of building XLR cables. The processes are:

Get the right measurement for the cable length

It is essential to get the right measurement for the cable length to avoid making a mistake. The first thing to do is to measure your cable and get the correct length you need.

Cables are delicate pieces. Any mistake you make can ruin the whole process. While cutting the wire to get the length, make sure to leave some inches for each connector.

Take away the outer covering

Cables have a protective shield that helps to keep the cable safe from destruction. The shield is thick and protects the cable from all forms of unfavorable elements. With the aid of a wire stripper or knife, take away the outer covering of the cable.

The best way to do this is to take an inch away from each end of the cable. While removing the outer shield, make sure you exercise a considerable level of patience and carefulness to avoid damaging the conductors and copper shielding.

Separate the shield from the conductors

At this stage, separate the shield of the cable from the conductors in the cable itself. After doing this, twist the strands of the copper together.

When there is a wire in contact with the shielding in the cable, join it with the copper shielding. Though the drain wire or the shielding can be removed, it is not entirely crucial because the XLR cables possess big terminals.

It is also important to point out that some cables do not necessarily need any form of cloth divider to separate. However, in this case, the right thing to do is to cut it with a knife.

 Put the heat shrink as well as the connector boot

Please take the appropriate measurement of the heat shrink and put it on the cable. It will cover any form of unprotected connection. Now, put the connector boot on the wire and use it to hold the rope as you work.

Strip off the layers of the conductors

It is essential to strip off the layers of the conductor. This is possible using a wire stripper. With the wire stripper in place, you can remove the negative and positive layers of the conductors.

However, it is essential to remove only the sufficient quantity to solder the conductors to the designated terminals. Twist the strands of the copper else; it affects the wires.

Put the wires into the connector

Put the cable into your hand tool and then the wire in one of the terminals. While the other wire is in the terminal, it is easier to keep it down with a soldering iron. By doing this, you can also reach for the solder if need be.

Solder

Put the soldering iron at the required point and then use the solder appropriately. Put sufficient solder into the cup terminal but ensure it isn’t more than required to prevent it from pouring out.

You can still play safe by using the needle-nose pliers to keep the wire in place while you wait for the solder to cool. Apply this step for the rest of the other conductors. Nonetheless, ensure you do so, soldering the wires at the right terminal.

Custom XLR Cable– Put away the heat shrink

When your conductors are at the appropriate terminals, put the heat shrink up the wire and then close up the heat shrink using the lighter. At this phase, absolute carefulness is your best bet to prevent you from causing a disaster.

Custom XLR Cable– Arrange the connector

Put the plastic sleeve in the cable while making use of the slot in the sleeve. Next, please put it in the plastic containing the XLR pins.

Put the metal casing over the components and make sure you arrange the connectors properly. Align the groove properly while making sure that the tongue is in the appropriate position of the sleeve.

Custom XLR Cable– Make the boots tight

Put the boot of the connector into the cable and screw it properly into the threads of the connector. When you tighten the end of the connector boot, it causes the end of the plastic sleeves to move inwards, making the cable stay in place. To ascertain if you are on the right track, you will hear a clicking sound when tightening the connector boot.

 Chapter 4: Custom XLR Cable–Where to Get Custom Made XLR Cable

Information is essential in getting custom-made XLR cables. The appropriate information to make the process successful is within reach of Cloom Tech.

If you are willing to get your choice XLR cables, Cloom Tech is readily available to assist you with the processes.

We are aware that it is difficult getting all the required material. Not to worry, we have the appropriate information on XLR cables.

Additionally, Cloom Tech possesses the most excellent hands in the industry to assist you with assistance on the way.

Our services include customizing XLR cables, providing the right material for the job, and appropriate professional help.

There is nothing to worry about! Your safety and comfort are our utmost priority.

Conclusion

The ability to make your XLR cables saves you the stress of going through the rigors of purchasing one. More so, it reduces the risks of buying an inappropriate XLR cable for your desired purpose.

To avert such unpleasant circumstances, you can rely on Cloom Tech to provide you with the right kind of custom-made XLR cables.

It comes with no stress at all. All you need do is to provide us with accurate information to build your specifications.

Cables just got easier!

Custom Medical Cable: What You Need to Know

Cables that work perfectly well in a non-medical environment can cause severe issues if used in the medical industry. In the pharmaceutical industry, a small margin of error can create a disastrous effect on the patients’ health, leading to pain, suffering, injury, and even death.

Thus, high-quality medical devices will be needed to reduce this error to a tolerance range that guarantees safety.

The medical cable is one of the critical components of the medical device. Therefore you need to know the structure, material choice, and properties of medical wires to get a high-quality one that performs well and guarantees safety.

If you want high-quality medical cable but don’t know how to go about it, don’t worry; the solution is here.

Just follow this ultimate guide.

Custom Medical Cable 1

Chapter 1: Understanding Custom Medical Cable

Custom Medical Cable 2


1. Medical Cable

So let’s get started; what are medical cables? Medical cables are highly developed insulated wires that allow electrical power, signal, and data between medical devices.

They are flexible, reliable, and durable to withstand a wide variety of environmental conditions. Due to the high sensitivity and precision of medical devices, medical cables are made of high-quality materials.

The material type and composition determine the application of the medical cable. There are countless applications of medical cables in the medical field.


2. Custom Medical Cable

Custom medical cables are designed to meet your specifications and environmental conditions.

You get to specify your requirements, such as the material, thickness of the conductor, length, wire configuration (stranded or solid), jacket, connectors, and even color that best suits your environment.

Don’t worry; everything is here for you; follow! How will you specify the requirements that suit your environmental conditions and still work perfectly well if you have no idea what they are?


Chapter 2: Structure of Medical Cable

Custom Medical Cable 3

The medical cable comprises three components contributing to its total performance: conductor, insulator, and jacket.


Conductor

The conductor is one of the major components that constitute the inner structure of the medical cable. It is responsible for the transfer of electrical signals in medical devices.

It is usually made of metals with high conductive properties in solid, stranded, or tinsel form. The conductor‘s performance is a function of its material composition and construction. The conductor’s size is dependent on the amount of current it will carry.


Insulator

The insulator is another critical component that forms the internal structure of any medical cable. Insulator offers high resistance to electrical flow.

Thus, preventing the conductors from coming in contact with each other and the environment. It also helps to impede electrical leakage to the patient.

Insulators usually have two main properties, dielectric properties, and compositions. These properties determine how efficiently the insulation will prevent electrical leakage.

They also affect the cable’s flexibility, biocompatibility, and resistance to environmental factors.


Jacket

In medical applications, there is a high possibility of the cable contacting the patients. Therefore, using the jacket, you must consider the electrical leakage to the patients during the design.

The jacket is the outer shield that covers both the insulator and conductor. It acts as an insulator, preventing the conductor and insulator from interacting with the environment.

Besides, it protects the inner components of the cable from damage during use, cleaning, and sterilization.

The jacket must meet the ISO 1099 and FDA requirements for bio-compatibility because they are the only material that may contact the patients. The jacketing materials must be bio-grade and biocompatible.


Chapter 3: Materials for Medical Cable

Custom Medical Cable 4

You need to know the materials used for each cable component to select the type that will meet your requirements. These are just a few of the numerous medical cable materials.


Conductor

Copper is the most commonly used type of conductor because of its high electrical conductivity and thermal resistance.

Apart from its excellent conductivity properties, copper has high flexibility. You can bend it to some degree without deforming it.

It makes it a great choice when you need to turn your cable to suit the environment. Copper is also relatively cheap compared to other conductors like gold and aluminum.

For high conductivity, you can also use an alloy of copper, such as


Insulator

There are wide varieties of insulation materials, each with properties for any given application. The commonly used ones are Polypropylene (PP), Polyethylene (PE), and Semi-Rigid Polyvinyl chloride (SR-PVC).


Jacket

When specifying your medical cables, you must consider the jacketing. There should be adequate care meeting the bio-compatibility requirements.

It must be durable and flexible to prevent damage during use, cleaning, and sterilization.

Below are the common jacketing materials used with their respective properties.

• Thermoplastic Elastomer or Thermoplastic Rubber (TPE/TPR): TPE/TPR is the most common medical jacketing material because of its excellent chemical resistance.

It is an excellent jacketing material for cable that requires cleaning and disinfection.

You can use it for cables in the surgery room and intensive-care instruments.

• Thermoplastic Polyurethane (TPU): TPU is an excellent choice for its strength. It is the most durable jacketing material for medical applications. It has superior tensile strength and exceptional abrasion and crushes resistance.

TPU is a suitable choice for cables regularly. However, it has weak resistance to high heat and some cleaning agents and techniques. That limits its use to a non-sterile environment.

• Polyvinyl Chloride (PVC): PVC is the least expensive jacketing material and offers excellent resistance to many commonly used sterilizing chemicals.

However, it is not suitable for autoclaving or high-temperature sterilization methods.

• Silicone: Silicone is the most preferred material for medical cable jackets because of its excellent autoclavable properties.

It is the only material that can withstand many autoclave cycles. That makes it an excellent jacketing material for sterilization. Apart from its autoclavable properties, it is lightweight and flexible.

However, it is more expensive than any other jacketing material and tends to tear and rip easily.

To enhance the cable quality, you can use air, water, vacuum, reinforcing elements, and some other components within the cable.


Chapter 4: Medical Cable Assemblies (Connectors and Types)

Custom Medical Cable 5

Medical cable assemblies are for making connections between medical devices. They consist of cables that band into a single unit using connectors; the connectors usually have plugs (male-end) and jack (female-end).

There are three major assembly types: equipment and sub-assembly interfaces, communication interfaces, and patient interfaces. Each of the assemblies has its applications.


Connectors

• Registered Jack (RJ) 45 Connectors: For transmission of serial data, RJ-45 Connectors are to be in use for transmission of digital data and information along the cable’s length. It has eight (8) pins outlet to which it is plugged into a jack.

• Bayonet Neill-Concelman (BNC) Connectors: BNC is an excellent choice to transmit the video signal. They operate in twist-locking motion to establish temporary or permanent connections.

• DIN Connectors: DIN connectors refer to any connector that conforms to the standards of Deutsches Institut für Normung.

They are usually multi-pins, with the pins arranged in circular or rectangular form to transmit the digital signal along the cable length.


Chapter 5: Properties of Medical Cable


1. Electrical Properties

The medical cable’s electrical properties depend on the conductor’s parameters. Parameters such as circuit resistance, intrinsic ohmic value, wire configuration (solid or stranded), platings, composition, American Wire Gauge (AWG), and flexibility all contribute to the electrical properties of the medical cable.


2. Mechanical Properties

Medical cables undergo tear and wear during use, which tends to affect the performance of the cable. Hence, a cord with high mechanical properties guarantees high performance, durability, flexibility, and a long life span.

The careful material selection goes a long way to determining the mechanical properties of your custom medical cable.


3. Thermal Properties

Another property you must pay attention to while designing your custom medical cable is the cable’s thermal properties (i.e., thermal conductivity).

It is the measure of the ability of the cable to conduct and transfer heat. It is slow in materials with low thermal conductivity while in materials with high thermal conductivity.


Chapter 6: Disposable and Reusable Medical Cable

Depending on how you want to use your cable, the type of materials, the sterilization method you intend to use, etc. Custom medical cable is classified into two types: disposable and reusable.

Disposable types are of low-cost material; they are for limited use. Insulators commonly used are PVC and PE, while bare or tinned copper is used for the conductor.

The reusable type is made with materials that can withstand several sterilization cycles.


Chapter 7: Applications of Medical Cable

Medical cables have found full applications in the medical industry. You see them in almost every area of the industry. These are just a few of the numerous applications you can use the medical cable for.


Diagnostics

  • CT scanners
  • MRI scanners
  • X-ray devices
  • Ultrasound equipment and probes
  • Ultrasonic scanners


Motorized equipment

• Hospital beds

• Dental chairs


Patient monitoring systems

  • Electroencephalographic (EEG)
  • Electrocardiographic (EKG)
  • Pulse oximetry
  • Endoscopes
  • Laparoscopes


Surgical and life support

  • Centrifuges
  • Anesthesia apparatus
  • Respiratory equipment
  • Ophthalmological instruments

Other applications include but are not limited to the catheter, defibrillator, medical implants, diagnostic imaging, and dialysis.


Chapter 8: Benefits of Custom Medical Cable

There are endless benefits you can derive from the custom medical cable. With custom medical rope, you get the cable that meets your requirements, ranging from the cable length, size, materials, and even colors.

Below are a few endless benefits you will get from custom medical cable.

• You save time installing and using your medical cable and device.

•, Unlike the store-bought type, your custom cables will be high quality. Hence, improving the quality and increasing its lifespan.

• Optimum performance of both the cable and the device.

Conclusion

Custom medical cable specifically fulfills your requirements, type of use, and environmental conditions.

You know several factors before the cable design for your application; disregarding these factors will affect the performance of your rope. Everything you need to know is in this article.

USB Type C Extension Cable: What You Need To Know

If you are using an internet-enabled device, the chances are that you are using a USB type C extension cable type.

These cable types are unique and are relatively notable for high speed. There are many USB-type extension cable types, which are different from the regular USB cables around.

How to identify the difference between the ordinary cable and the type C extension cable? It is quite simple. The first thing that you should observe is length.

These cable types are longer than usual. However, there are still other notable differences. Read on! Do you want to know more?

An image of USB extension cable on white background

Chapter One: Understanding USB Type C Extension Cable

What is the USB type C extension cable?

That is an extendable cable type. It aids in transmitting data and power.

USB Type C extension is sometimes mistaken for the micro USB cable.

How does it work?

The USB type C extension cable is compatible with several mobile phones, tablets, and computer types.

Chapter Two: Where to Customize the USB Type C Extension Cable

That is one question that seems to have no direct answer. Too often, you may ponder where to customize the USB type c extension cable to meet your expectations.

There are quite a handful of self-acclaimed professionals who claim to be service providers, but they do more harm than good in the long run. The big question is, “how do I discover good service providers?

There are different ways of discovering the right service providers.

There are options for asking around or using the internet to get the right service provider. One notable place to customize the USB type C extension cable is Cloom Tech.

Cloom Tech is a service provider with a distinguished history of delivering excellent service. At Cloom Tech, many seasoned professionals ensure that the USB type C extension cable is designed according to the specification given.

It may seem far-fetched, but in reality, it is not. It is very achievable, provided you give the necessary details.

How to write your discretion

The color you desire: 

Everyone has a choice, and so do you. Specifying the kind of color, you fancy for the extension cable is essential.

Length:

 The cable length is always necessary for building specifications. To get the best type of design, Cloom Tech requires information on the type of cable length you need.

Compatibility: 

USB Type C extension cables are compatible with many devices. So, it is pertinent that you specify the devices you want the extension cables to be compatible with.

Shielded or unshielded:

 This is another requirement to build the right design for you. At Cloom Tech, we are responsible for perfection. However, to achieve it, we needed to know how best to please you. Using the USB type C extension cable determines whether you settle for a shielded cable.

With all this information in place, be assured of getting the exact type C extension cable your design.

Nonetheless, our experts ensure that they provide an accurate guide and information. One such guide is to inform you of the advantages and disadvantages of the options you settle for.

In all, Cloom Tech provides a second-to-none service delivery. That is evident in all our interactions with prospective clients and customers.

We do not only tailor the design to meet your specification; we always walk with you to build a flawless and sustainable design.

Should our services be required, we are only a mile away from helping you reach your desire.

An image of USB cable extension transparent and protected plugged

Chapter Three: USB Type C Extension CableOther Forms of USB

USB 1.0

This type of USB became famous in 1996. During its introduction, it was greatly accepted. One major shortcoming of this cable type is its rate of transferring data. It also does not ensure speed in data transmission.

Quite a several devices suitable for the USB 1.0 were a keyboard, mouse, and so on. That is because the devices did not use a large number of data.

USB 2.0

USB 2.0 is an upgraded form of USB 1.0. It performs at a faster speed and transfers a more considerable amount of data than USB 1.0.

One distinguishing feature of USB 2.0 is that it still works well with the USB 1.0 port. USB 2.0 effectively replaced USB 1.0 because of its modern features. Some devices, such as cameras and camcorders, made use of it.

USB 3.0

This USB type is better than USB 1.0 and USB 2.0. It transmits data at an incredible speed.

This USB type aids the transfer of data and information from a computer to other devices. It also connects with USB 2.0 and works well with it. This USB type is more efficient than USB 2.0 and makes up for areas where USB 2.0 is lacking.

An image of black long computer cable

Chapter Four: The Future of USB Type C Extension Cable

The important question is, “what is the future of the USB type C extension cable?”

Design

It is essential to state that this USB type is not new emphatically. Its existence dates back many years ago. The USB cable type evolved from the USB 1.0 cable type and grew to something better for its users.

Virtually all devices make use of the USB cable for various needs. Since this is true, there are still some concerns about the type C extension cable.

The changes that spring up from new USB cables give room for worry. Nonetheless, the design of the USB cable is to create a better function.

Recently, the USB cable design did not match the Lightning cable because of its latter features. The lightning cable appears thicker, while the type C extension cable seems fragile.

However, the cable is still favored over any other cable type and even introduces good designs to meet technological innovation.

Connection

The type C extension cable is virtually working on all electronic devices. That explains why many devices will be dependent on these cable types for the appropriate result in the nearest future.

It works well on smartphones, cameras, camcorders, and any USB-C port device.

An image of black color female USB extension cable

USB Type C Extension Cable–Conclusion

It is quite right that there are some cable types. Since this is true, the type C extension cable type remains relevant.

The cables are essential in homes, offices, and many places that require uninterrupted data.

It was a good read. The future of cable is also encouraging as it works on almost all electronic mobile devices.

If you require help getting the optimum custom cable result, we are your best bet for a top-notch service provider.

Jumper Wire Assembly: What are They?

jumper cables

Jumper wire assembly helps make wire harnesses or jumpering between PCB headers, especially during prototyping. With jumper wires, repair, maintenance, and replacement become very easy. But what are jumper wires?

What are jumper wires?

The jumper wire is a simple electrical wire with connector pins at both ends. You can also call them wire jumpers or DuPont wire. 

You can use these wires to interconnect different breadboards or test circuit components. Jumper wires help to make internal connections and also connections with equipment without soldering.

Jumper wires are either a single wire or a group of wires. You can fit individual jumper wires by inserting their connectors in the slots provided in the breadboard, piece of test equipment, or a board’s header connector.

How does the jumper wire work?

A jumper wire is a simple electric wire connecting distant electric circuits used in PCBs.

When you use a jumper wire on the electric circuit, you can control the flow of electricity. You can either stop the operation or operate a circuit that is impossible with normal wiring. Also, when you need specific changes or design changes on PCB, want to reinforce any defective part, partially hold the function, or change the circuit configuration, you can do this by attaching or detaching a jumper wire. 

Types of connectors

Jumper wires differ based on the types of connectors at their ends. Some jumpers have the same connectors, while others have different ones. Here is a list of common connector styles found in jumper wires:

Solid Tips: 

You can use these connectors on a breadboard or a female header connector. The breadboard has an organized arrangement of elements that allow easy insertion of wires and components. As a result, the density of the jump wires and components increases in the breadboard without fear of short circuits. You can use wires of different colors to distinguish the working signals when using too many jumper wires. 

Crocodile clips: 

You can temporarily use these clips to bridge sensors, buttons, and other elements with equipment or components that have random wires, connectors, and screw terminals.

Banana connectors: 

You can use these connectors on test equipment for low-frequency AC signals and DC.

Registered Jack: 

You can use these in computer networking and telephone. The connectors for them are RJ45 and RJ11, respectively.

RCA connectors: 

You can use these for composite video signals (low resolution), audio, and other low-frequency applications.

RF connectors: 

These connectors help to transfer radio frequency signals between antennas, test equipment, and circuits.

Alligator clip:

Alligator clips are mainly fancy jumper wires with two spring metal clips at both ends of the wire. These clips give jumpers a unique connecting point that allows them to connect to different situations, which is impossible with traditional jumpers. 

RF Jumper cables:  

These are small and more bendable cables that you can use to connect antennas and other equipment to network cabling. You can also use them in the base station to connect radio units to antennas. The diameter of the most bendable jumper cable is ½”.

Can jumper wires be soldered?

Yes, you can solder the jumper wires if the soldered portion is visible at opposite ends. The outline of the soldered wire connection must be visible as in a through-hole component lead. Insulating the jumpers soldered to components is essential to prevent short circuits.

You can solder jumper wires by following these steps:

  • First, strip the jumper wire and open the strippers
  • Secondly, in the jumper wires
  • Now, solder the jumper wire to the board. Poke the tinned jump wire ends through the PC board
  • Now, clip the extra wire and set the cutters near the wire base
  • Finally, desolder the joints.
breadboard

Caption: breadboard

Jumper wire colors:

You can find jumper wires in different colors; however, the colors do not indicate anything. The wire color is just for identifying the jumpers and keeping track of other connections, and using different color wires for the same operations will not affect its working. 

However, you can pick colors to make things convenient. For example, you can use red for ground and black for power.

Jumper wire assembly types

There are three versions of jumpers:

  • Male-to-male
  • Male-to-female
  • Female-to-female

The difference between them lies in the wire’s endpoints. In the male one, there is a protruding pin that you can insert into any socket to make connections. On the other hand, in the female one, there is no such pin at the female ends, and you can use female ends to plug things into them. The most common jumper wires are male-to-male, which you also use to connect two ports on the breadboard.

breadboard jumper cable wires

Caption: breadboard jumper cable wires

How to use jumper wires:

Jump wires help to modify a circuit or to diagnose a problem in a circuit. You can use these wires in different applications through the following steps:

Step 1:

First and foremost, follow all electrical safety precautions. Be extra careful when handling high-voltage circuits. Also, be attentive to low-voltage circuits.

Step 2:

Find out a suitable connector for your jumper wire. You can also use bare wire ends to connect two circuit points. However, if it is your first time, be cautious and use alligator clips, soldering, or any other connection for the jumpers.

Step 3:

To identify a fault or damage in a circuit, bypass the circuit with the jumper wire by connecting the jumper wire between two test points. 

Step 4: 

Next, connect the jumper wire to any ammeter or voltmeter for taking measurements across two points.

Step 5:

If you are making permanent connections with a jump wire, use the correct cable type of jumper. Remember to consider the gauge and insulation of the wire based on the application.

Step 6: 

It is always good to test the modifications with the temporary jumper wire before setting up the permanent connection. Check the circuit’s electrical performance and see if it works as desired.

Conclusion:

Making jumper wires is indeed very easy. However, did you think of the time, effort, and tools required to manufacture jump wires?  You will need a cutting tool, wire, terminals, crimping tool, stripping tool, heat shrink, and heat tool on hand. Further, looking at every step and following it will definitely become a cumbersome task for you. Don’t worry; we have done that tough part for you.

We have made high-quality jumper wires for you so that you pick and plug them in. Our jumper wires are very flexible so that you can bend and twist them without any fear of damage to insulation. Further, our jumper wires are pre-terminated, making your installation much easier.

Get A QUICK QUOTE

Fill in your details and we’ll get back to you in 24 Hours.

contact us

Get A QUICK QUOTE

Fill in your details and we’ll get back to you in 24 Hours.