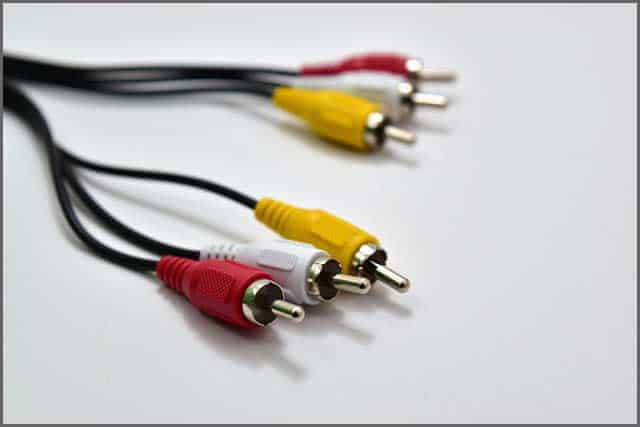
RCA cables are vital in that it helps in transmitting audio signals. More so, there are possibilities that this cable type will transmit video signals with suitable means.
What happens if the RCA cable you bought is inappropriate? You go through the stress of going back to the store and laying a complaint. It is cheaper to get a custom-made RCA cable than going through the rigors of purchasing one.
Let’s have a clear picture about it.
Get Your Free Sample!
Explore our custom services now. Email us at [email protected] for more details.
Chapter 1: RCA cable
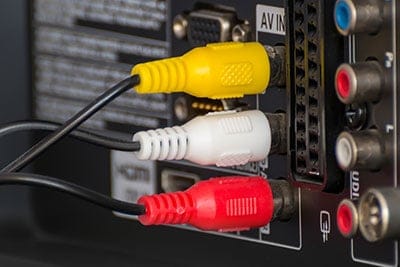
RCA cables are cables that are essential for entertainment purposes. The veracity of these cable types is very evident in homes and offices. Its importance is second to none as it helps to ease the transmission of audio sounds.
It is also an analog process of transmitting audio signals. Using the RCA cables with high-definition television is possible with the appropriate methods.
These cable types are very multifunctional. This implies it can function like HDMI and the differences between both cable types are almost inexistent. Interestingly, the cables are not as expensive as HDMI cables and perform just as much as the HDMI cable.
Get Your Free Sample!
Explore our custom services now. Email us at [email protected] for more details.
Chapter 2: Building the RCA cable
There is no such thing as complicated or tedious. It all begins in the mind. If there is a way to get it right, you can follow the instruction and do what is right. The process of building a custom-made RCA cable is self-explanatory. It only requires your ability to follow the instructions. The following steps are the essential guide to building your specific RCA cable design.
Prepare Tools and Materials needed to build the custom-made RCA cable
In making the RCA cables, there are facts you need to be familiar with. The facts stem from the reality that you cannot achieve anything tangible, except you have the right tools and material for the job.
- Needle-nose plier
- soldering iron and a solder
- Wire strippers/ wire cutters
- Hot glue gun. This is an optional tool
- Heat gun. It is not a compulsory but optional tool.
- Continuity tester/ multimeter
- Helping hands
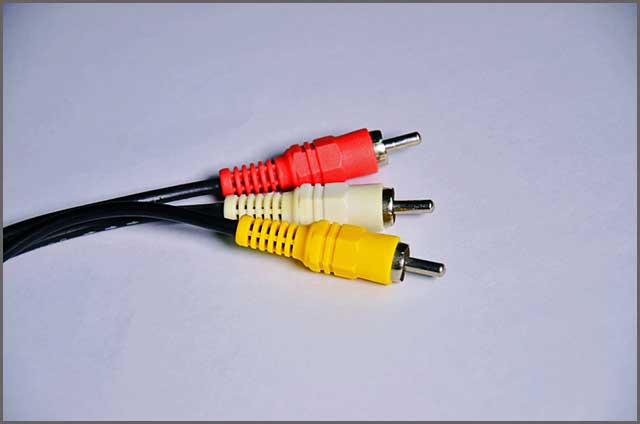
- RCA cable ends. This is readily available on the internet or in a tech store. Furthermore, you can also make use of the cable sin old cables make sure to extend it.
- Wire
- Heat shrink tubing. This is optional.
Pay attention to the wire:
The wire is vital to creating your own RCA cable. The first thing is to make decisions about the length of the cable you want to build.
This implies deciding if you want a short or long cable. Then, cut your wire. After cutting the wire, split the ends into two and strip the ends of the cable. When doing this, ensure you pay attention to any markings on the end of the cable.
Now, open the ends of the RCA cable. Put a piece of heat shrink tubing on the end of the cable. To do this, unscrew the back half of the casing.
Solder:
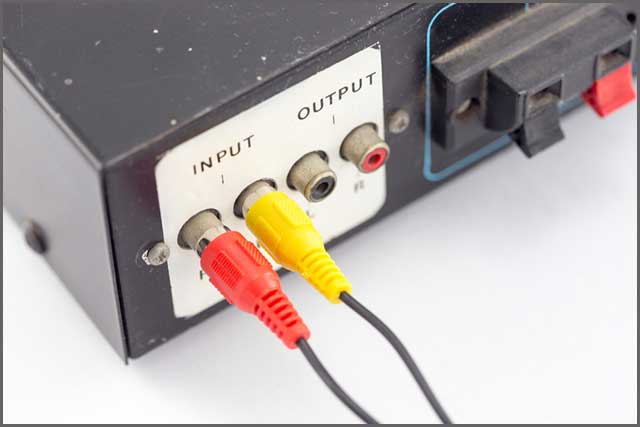
The male end of the cable terminates on the short part of the metal tab. This is known as the data wire. At the same time, the female end of the cable terminates on the long part of the metal tab.
The female prong is also the part that shields the data.
In situations where an end of your wire possesses a marking, it is easier to use. The only thing you need to do is take part with no marking and thread it through a shorted metal tab while twisting it inside out.
A lead surrounds the tab, bends the bends, puts it in its appropriate position, and solders itsoldersr, cutting off the part of the exposed wire.
Now, the marked part of the wire is available. Take it and follow the same procedure with the short metal tab.
While doing this, ensure you don’t overheat any part of the tabs to prevent situations where the plastic housing melts and the threads deform.
Put the collar in place:
You will see two tabs stick out; these tabs make up the collar. The essence of these tabs is to ensure the cable is in good working condition against all the odds.
Though, to ensure your cable is always in good condition, do not yank at the wire; instead, pull it from its plastic housing.
To secure the tabs, bend them over the wire and clamp them together. One thing to take note of is to avoid the situation where you overdo the clamping process. The disadvantage of overdoing it is that you may cut the two wires too short.
Recheck the wires and make sure they are in good condition.
Repeat the soldering procedure:
Before you go through the soldering process again, be sure that the different ends of the cable are in place.
That is, you need to thread the two back casings of the rope over the wire. The first end is suitable on the threading wire, while the second needs to go with its butt first.
Perhaps, you can also attach a second heat shrink tubing. Ensure that the unmarked part of the wire is compatible with the short part of the metal tab and the marked end is for the long part of the metal tab.
However, in situations where there is no marking on any part of the wire, make use of your continuity tester to guide you.
After all, this is in place. You can repeat the soldering procedure.
Keep the wire safe:
This part is where you make use of all the optional tools. The heat shrink tubing is the first part that needs serious attention. This is because the heat shrink tubing helps to make the cable rigid.
Put the wire as high as possible. However, make sure to cover the clamps of the collar. This is to secure the wire. Next, make use of a heat gun to shrink the size of the tubing.
Better still, you can also make use of the hot glue. Put the hot glue firmly between the soldered tabs. This keeps the wire safe and secure.
Screw the casing together:
This is the last process to building a custom-made RCA cable. At this stage, the housing of the wire is screwed over the soldered parts of the tabs. To play safe, run a continuity test on the cable.
However, in whatever you are doing, make sure that the prong and the collar of the different sides of the cable are not shorted. You can also choose to make the male prongs and outer collars shorted.
Chapter 3: Csutom RCA Cable Supplier — Wiringo
Wiringo is reliable in providing a custom-made RCA cable. The materials and tools for building the cable are within our reach, and as such, we are readily available to help you develop your design. Furthermore, we bring our services to your doorpost, and we are just a phone call away from helping you build your design.
Conclusion
Custom-made RCA cables are very efficient in so many ways. Getting a custom-made RCA cable eliminates all the disadvantages of buying the RCA cable. The reliable hand to help you build your design is Wiringo. We are available to help you build your preferred one.
Get Your Free Sample!
Explore our custom services now. Email us at [email protected] for more details.